Friday 28 December 2012
New Daylight system controller
Release
1.02q of OctaneRender for Poser will feature a new sunlight controller -
which I think is pretty amazing. The video below gives a rundown on
it's operation.
Wednesday 21 November 2012
PoserPhysics SR1 has been released
To update to SR1, re-download the installer from the Content Paradise. Release notes are at http://poserphysics.blogspot.com/2012/08/final-sr1-release-notes.html. The product is available at http://www.contentparadise.com/productDetails.aspx?id=21456.
Monday 19 November 2012
OctaneRender for Poser Has Been Released
Version 1.0 of the plugin was released today. There is a video of all the features in action at https://vimeo.com/53821805. The feedback so far from the beta testers has been incredibly positive, so I think everyone will love this plugin!
See http://render.otoy.com/forum/viewtopic.php?f=7&t=25193 for more details.
See http://render.otoy.com/forum/viewtopic.php?f=7&t=25193 for more details.
Sunday 11 November 2012
OctaneRender SSS Skin Shader
Poser Skin materials are converted to an OctaneRender glossy material by the OctaneRender for Poser plugin. This will get you 90% of the way to a realistic human skin render. If you want to push the envelope, the you can build your own OctaneRender SSS shader, and save it (rightclick the material in the Material tab of the plugin and select Export) using the plugin for use on all your human figures.
This is the SSS shader I have been using for the Victoria 4 figures. It should work fine on other figures. The shader is made up of a diffuse and a glossy material, mixed together with more (0.7) diffuse than glossy. The diffuse will provide the SSS, whilst the glossy will provide the highlights.
NOTE: The only need to do the following ONCE! Create the shader once, then save it as a material (rightclick -> "Export Material"), then copy and paste the material it to all the skin materials of your figure and rightclick the mesh -> "Export all Materials for this Figure/Prop". Then you can reload all the skin materials with the SSS shader at any point, and keep or replace the texturemaps that are currently assigned to the figure.

To create this shader, pick a skin material on you figure. Then change the material type from "glossy" to a "material mix" (change the node type in the bottom box of the plugin window). Set the "amount" to 0.7, leave "material1" as a "diffuse" material and set "material2" to "glossy".
Expanding "material1" (the diffuse material) above shows...

The important parts are:
Expanding "material2" (the glossy material) shows...

The important parts are:
IMPORTANT - you need to use the "pathtracing" kernel in order for the "scattering" node to work. Also, I recommend reducing the scene "gamma" in the imager settings (try around 0.8).

Good luck!
This is the SSS shader I have been using for the Victoria 4 figures. It should work fine on other figures. The shader is made up of a diffuse and a glossy material, mixed together with more (0.7) diffuse than glossy. The diffuse will provide the SSS, whilst the glossy will provide the highlights.
NOTE: The only need to do the following ONCE! Create the shader once, then save it as a material (rightclick -> "Export Material"), then copy and paste the material it to all the skin materials of your figure and rightclick the mesh -> "Export all Materials for this Figure/Prop". Then you can reload all the skin materials with the SSS shader at any point, and keep or replace the texturemaps that are currently assigned to the figure.

To create this shader, pick a skin material on you figure. Then change the material type from "glossy" to a "material mix" (change the node type in the bottom box of the plugin window). Set the "amount" to 0.7, leave "material1" as a "diffuse" material and set "material2" to "glossy".
Expanding "material1" (the diffuse material) above shows...

The important parts are:
- diffuse is a multiply node. So copy the existing texturemap (rightclick-> copy image node), change the diffuse node from image to multiple. Then rightclick texture1 and "paste image node"
- texture2 - this removes some red from the image map (to compensate for the red being added by the scattering medium. Start with red=150, green=200, blue=255, and adjust to get the right skin tones.
- transmission - set to red=255, green=0, blue=0. So change it from the default "floattexture" to "RGBspectrum". IMPORTANT: You can also copy and paste the image node from above into this node, which nicely stops SSS appears on dark areas of the map (like hair). If you do this, lower (halve) the "scale" below.
- medium - change from "absorption" to "scattering".
- absorption/scattering. The ratio of these two multiplied by the scale seem to control the amount of SSS (and how far it travels). The settings above seems to give a good starting point for human figures. NOTE: The plugin rescales to figures to OctaneRender units, so these settings will be too high if you setting this shader up in OctaneRender Standalone.
- scale - IMPORTANT - this number effects the amount of the SSS effort. Small number like 2-5 will give lots of SSS, large numbers like 20-50 will give a very subtle SSS effect. Adjust the scale to get the effect you want for the lighting in the scene.
Expanding "material2" (the glossy material) shows...

The important parts are:
- texture1 - this is the image map for the material, and can be copies (rigthclick -> copy image node) from the diffuse material above.
- texture2 - this is currently set to 255/255/255, but can be used to fine tune the skin tone.
- specular - change from the default "floattexture" to "RGBspectrum". Set the color to red=10, green=20, blue=30
- roughness - Increasing from 0.3 will result in drier looking skin. Reducing results in very oily skin.
- Remember to set filmwidth to 1.0
IMPORTANT - you need to use the "pathtracing" kernel in order for the "scattering" node to work. Also, I recommend reducing the scene "gamma" in the imager settings (try around 0.8).

Good luck!
OctaneRender for Poser Features
OctaneRender for Poser is a fully integrated OctaneRender solution for Poser 9 and Poser Pro 2012. OctaneRender is the world's fastest and most feature rich unbiased render engine. This plugin provides access to all OctaneRender functions from the Poser user interface.

The plugin has been specifically designed to suit the workflow of Poser users. So all the OctaneRender options are available in the one setup screen, activated from the Poser Render menu.
The plugin automatically converts your Poser scene geometry and materials into the Octane scene, so you get a quality render with just the default settings. From the Octane settings window you can specify camera and image parameters, select from 4 available OctaneRender rendering modes, and choose between image based lighting, sunlight, or geometry emitters to illuminate your scene. The plugin will even convert any Poser IBL images and assign them to the environment map lighting in Octane. All Poser Materials will be converted to Octane materials, and you can edit these materials in the Material tab (see below). Righclicking the props, figures or materials in the tree allows you to do various macro functions, including loading and saving individual materials or entire material collections.

Once you open the Octane Render Viewport, the render starts immediately, and is instantly refreshed when you change the Poser camera direction, or change any of the Octane materials.

The viewport (shown above) allows you to start and stop the render, lock/unlock the resolution, save the image, drag the viewport to resize the render and get vital rendering statistics (the bottom status bar). If you click anywhere in the image, the focal distance will be set to that point.
The viewport is immediately updated with any new material or OctaneRender settings that you change. The "imager" settings can be changed at any time without causing the render to restart.

There is an on-line material database, containing hundreds of materials, which can be loading into your scene.

Animations can be rendered via the Animation tab. This contains controls for start and end frame, camera focus behavior, and even allows the keyframe animation of light emitter intensities.

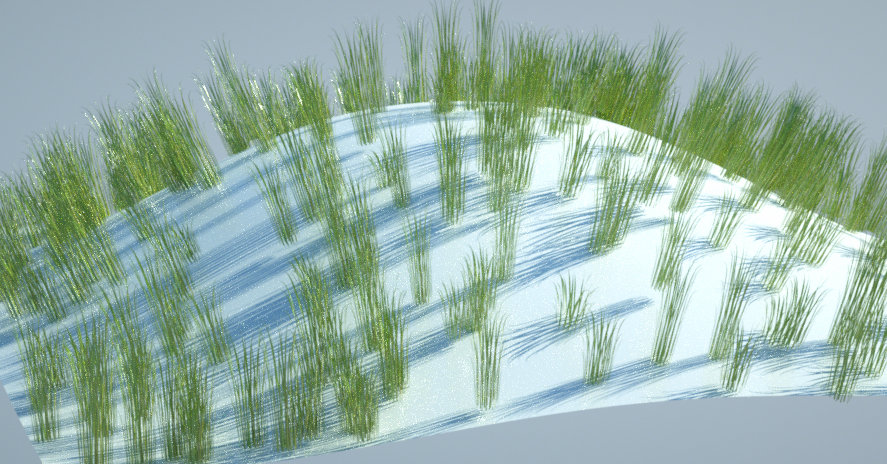
The first update for OctaneRender for Poser will include the new Instancing features of Octane, allowing a single prop to be duplicated in the scene many times.

OctaneRender for Poser will be available from render.otoy.com from mid-late November 2012.

The plugin has been specifically designed to suit the workflow of Poser users. So all the OctaneRender options are available in the one setup screen, activated from the Poser Render menu.
The plugin automatically converts your Poser scene geometry and materials into the Octane scene, so you get a quality render with just the default settings. From the Octane settings window you can specify camera and image parameters, select from 4 available OctaneRender rendering modes, and choose between image based lighting, sunlight, or geometry emitters to illuminate your scene. The plugin will even convert any Poser IBL images and assign them to the environment map lighting in Octane. All Poser Materials will be converted to Octane materials, and you can edit these materials in the Material tab (see below). Righclicking the props, figures or materials in the tree allows you to do various macro functions, including loading and saving individual materials or entire material collections.

Once you open the Octane Render Viewport, the render starts immediately, and is instantly refreshed when you change the Poser camera direction, or change any of the Octane materials.

The viewport (shown above) allows you to start and stop the render, lock/unlock the resolution, save the image, drag the viewport to resize the render and get vital rendering statistics (the bottom status bar). If you click anywhere in the image, the focal distance will be set to that point.
The viewport is immediately updated with any new material or OctaneRender settings that you change. The "imager" settings can be changed at any time without causing the render to restart.

There is an on-line material database, containing hundreds of materials, which can be loading into your scene.

Animations can be rendered via the Animation tab. This contains controls for start and end frame, camera focus behavior, and even allows the keyframe animation of light emitter intensities.

The first update for OctaneRender for Poser will include the new Instancing features of Octane, allowing a single prop to be duplicated in the scene many times.

OctaneRender for Poser will be available from render.otoy.com from mid-late November 2012.
Monday 5 November 2012
Instancing
I've been looking at how Instancing could be applied in OctaneRender for Poser. It's going to be as simple as changing the "mesh" type to "scatter" for a Poser scene element.

Once it's a "scatter" node, select a pre-calculated transformation matrix (csv) file, or generate a new one. You specify the Poser prop that the instances will be randomly placed on, and specify some density and randomising paramters. Calculating 1000 instances only takes a few seconds.

Then render!


Once it's a "scatter" node, select a pre-calculated transformation matrix (csv) file, or generate a new one. You specify the Poser prop that the instances will be randomly placed on, and specify some density and randomising paramters. Calculating 1000 instances only takes a few seconds.
Then render!
Friday 19 October 2012
More OctaneRender for Poser Progress
The OctaneRender for Poser plugin is nearly the end of testing, so will hopefully be available shortly. The video below shows some of the animation features, which I think are pretty amazing! Only linked here - since it's hosted on Vimeo.....
https://vimeo.com/51657952
https://vimeo.com/51657952
Thursday 11 October 2012
OctaneRender for Poser Progress
It's been a while since I've posted, mainly due to being flat-out on the OctaneRender for Poser plugin. Thankfully it is now 99% complete, is in beta testing, and will hopefully require a few tweaks and bug fixes. Following is a sample animation of the old Newtons Cradle (from PoserPhysics) animation.
Also, I found a very small issue with PoserPhysics SR1, so halted the release a few weeks back. I have now rectified the issue and it will be sent for packaging in the installer in the next week or so. Again, anyone wanting SR1, pls let me know.
Also, I found a very small issue with PoserPhysics SR1, so halted the release a few weeks back. I have now rectified the issue and it will be sent for packaging in the installer in the next week or so. Again, anyone wanting SR1, pls let me know.
Tuesday 18 September 2012
OctaneRender for Poser
It's bene a few weeks since I posted here, and that is because I have been flat-out developing a plugin for Poser for the OctaneRender engine. The announcement by Otoy (developers of OctaneRender) is here....http://render.otoy.com/forum/viewtopic.php?f=7&t=23642
More details on the workflow and functionality should be available over the next few weeks, and I'll either post them here, or start a new blog.
If you have any questions, either direct them to be on the Otoy forums or in the thread at Renderosity.
More details on the workflow and functionality should be available over the next few weeks, and I'll either post them here, or start a new blog.
If you have any questions, either direct them to be on the Otoy forums or in the thread at Renderosity.
Thursday 9 August 2012
Ragdoll Physics Tutorial
This tutorial shows some of the more advanced options in the ragdoll system used by PoserPhsyics.
Tuesday 7 August 2012
Final SR1 Release Notes
This is the final list of SR1 changes. SR1 will now be incorporated into the PoserPhysics 2012 installer, and will hopefully be available in the next month (after final testing). If anyone would like a pre-release version, pls email me you proof of purchase and I'll email you the update.
New Features
- Universal Joints have been added. The UniversalX is
like a ball joint, but with no SPIN/TWIST in the X Axis direction (as
the props are positioned in frame 1). UniversalY has no spin in the Y
direction, and UniversalZ has no spin in the Z direction. Universal
joints are great for simulating things like chain links.
- The system will now ignore Invisible props (since this adversely effect the simulation).
- Added joint rotations around the Child origin and
endpoint. The original "Origin" and "Endpoint" selections have changed
to "Join To Origin" and "Join To Endpoint". Use the "Prop Origin" or
"Prop Endpoint" for prop ball joins to the GROUND so it rotates on it's
own Origin or Endpoint point.
- You can now join a prop to the GROUND for fixed joints, and other joints where the anchor point is "This Prop Origin" and "The Prop Endpoint".
- Added Cylinders. Use the PoserCylinder to add cylinder elements to your scene. IMPORTANT: The ODE does not support Cylinder to Capsule or Cylinder to Cylinder collisions. So the PhysicsCylinder will only bounce (collide) off boxes, spheres and static trimesh shapes. The cyclinder has been included for use as car wheels, where cylinder to cylinder and cylinder to capsule collisions are generally not required.
- Added Damping to the simulation, so that objects do not spin or roll forever. In the unlikely event you need to change the default settings, change the PoserPhysics-LinearDamping and PoserPhysics->AngularDamping parameters on the UNIVERSE actor.
- For joining props, you NO LONGER USE THE POSER PARENTING system. Instead, simply select the prop to join the current prop to in the "Join To" combobox in the Prop/Figure Settings tab of the PoserPhysics window. Any parented prop in your scene will be unparented when the simulation is run.
- If a prop has other prop joined to it, you can click the “Create Group” button to make a Poser Grouping prop with the current prop, and all props joined to this prop in the group. You can then scale, rotate and move the group as required.
- Added the setGravity(gravity) function to the API. Removed the PoserPhysicsEngine(gravity = ?) option - simply call as PoserPhysicsEngine() now.
- Motors have been added. These are a special type of
Hinge joint, which has twist force applied. Select the MotorX, Y or Z
joint type. The velocity of the rotation is set in the
PoserPhysics->Velocity dial for that actor, and the acceleration is
set by the PoserPhysics->MaxForce dial. For a simple sample, load a
box, lift it a little, join it to the GROUND, set to MotorX, anchor
point Child Endpoint.
- A new ragdoll keyframe movement type has been added called "Locked".
This mode creates the ragdoll, but locks the joints in a fixed
position. There are additional dials added to the ragdoll
called PoserPhysics-RagdollERP and PoserPhysics-RagdollCFM, which is you set
this to anything other than the -1 default, applies this value to the ERP and CFM
of the joints. In effect, you can make the joints rigid (with an ERP of 1
and CFM of 0), or flexible (with an ERP of 0 and CFM of 1). This is experimental at this
stage, so use at your own risk!
- A force prop has been added. Load the PhysicsForce prop from the
Primitives folder, parent it to a ragdoll or prop, and then set the force
amount and frame to apply that force in the parameter dials for that prop.
Fixes
- The PoserPhysics 2012 window will now not dock onto the Poser UI.
- There is now user input validation of the numeric input fields of the PoserPhysics dialog.
- You can now no longer have two PoserPhysics windows open at the same time
- Fixed the instance where checkbox inputs were not being saved in the Scene Settings tab
- The capsule has been renamed to PoserCapsule. Delete the capusle.pp2 (not ppZ!) file from the primitives folder. The standard Poser capsule and cylinders are not supported - use the PhysicsCapsule and PhysicsCylinder instead.
- Fixed an instance when the old version of PoserPhysics had been installed on Poser 9/Poser Pro 2012, stopped the new version from working.
Friday 27 July 2012
PoserPhysics Extras
I am releasing a freebie bundle of utility scripts which assist with PoserPhysics 2012. Once installed, the bundle is available in the Scripts -> PoserPhysics -> PoserPhysics Extras menu. In some cases, these scripts require PoserPhysics SR1 (which is still a couple of weeks away from being released). The scripts include:
ClearAllKeyFrames.py - Run this script to remove all physics simulation position and rotation animation keyframes from the scene for all props and figures. This is handy when you change a figure or prop from Moveable to Keyframed (since you will want to delete the physics keyframes for that scene element).
CreateChain.py - This script helps you create already (PoserPhysics) joined chains of boxes, spheres, capsules and chain links. Select the shape, number of links and the gap between the links, then click the Make Chain button. Once the chain is made, select the leftmost object and the click the Create Group button in PoserPhysics to create a Poser Grouping prop to enable you to move the chain around. If using Hinge joints, keep the chain pointed in the X, Y or Z axis. The following video was done with the help of this script....
DeleteAllChainProps - If you need to recreate your chain, then use this script to delete the original chain before recreating with CreateChain.py.
MakeAllForcePropsInvisible.py - If you are using PhysicsForce props, you will not want them to render in your animation, so make them all invisible with this prop.
MakeAllForcePropsVisible.py - Use this script to see you PhysicsForce props if needed after using the above script.
MakeAllPropsImmoveable.py - This script will make every prop in your scene Immoveable (in PoserPhysics). This is handy is you have loaded a large room scene with lots of furniture or other items which will be static in the simulation.
Tower.py - This script can be run to make the tower used in the following video. You can amend the script to generate different shapes. Remember to reduce gravity so the tower stays upright (use -3 or -4).
Download the scripts here.
Cloth Simulation
This is a video of an actual simulation calculation being done in Poser, using the PoserPhysics prototype Soft Body Dynamics system. The ball is a rigid body and the HiRes Square is a soft body.
Chain and Cogs
A quick animation to try to simulate a chain around 2 wheels/cogs. Chain was made with a helper script I'll provide for download when PoserPhysics 2012 SR1 is released, and is basically 20 boxes linked together with HingeZ joints.. Both wheels (cylinders) are motors in the Z axis.
Thursday 26 July 2012
Soft Body Dynamics
I did this to prove the concept, but it might end up in a simulation tool at some point.
Tuesday 24 July 2012
Joint Anchors Tutorial
A quick tutorial showing the different joint anchor positions in PoserPhysics 2012 SR1.
Saturday 21 July 2012
PoserPhysics Force Prop
A new prop is being introduced in PoserPhysics 2012 SR1, which allows a force to be applied to a ragdoll part or prop at a certain frame. The force can be applied to Moveable, or Keyframed Until Hit figures and props. Keyframed Until Hit figures and props will be converted from Keyframed to Moveable at the frame the force is applied.
Simply parent the PhysicsForce prop to the element you want to apply force to and run the simulation. The force intensity and frame that the force is applied at can be set in the parameters dials of the force prop. If the force prop is parented to a part of a figure which is not converted to a ragdoll (ie. a finger), it has not effect. Set the force prop to be invisible prior to rendering the animation.
Samples are here:
Tutorial is here:
Wednesday 18 July 2012
Glass Ceiling
A quick PoserPhysics animation showing Ryan falling from a glass ceiling window. The window is created with 5 semi-transparent boxes, held in place with an Immoveable frame.
Tuesday 17 July 2012
Chain Animations
This video gives an example of the types of chain animation that can be done in PoserPhysics 2012. Each chain link is made up of 6 capsules, with fixed joints between each capsule - all capsules are 100% transparent, so they do not render. There is a chain link prop that is parented to one of those capsules for each link (which is excluded from the simulation), and it is that prop that is rendered. There are no physics joints between the links.
I have written a small python scripts to create the links, which I will release at some point. The second half of the video shows how this script was used to help create the start frame for the final sequence. The final sequence needed a smaller CFM of 0.000001 and a joint hardness of 0.8 (in order to keep the capsules together).
Pls leave any comments or questions on the facebook page - www.facebook.com/poserphysics.
Sunday 1 July 2012
Man Falling Off A Crane!
This animation was sent to me from a PoserPhysics 2012 user. The gravity is set to -5 and the jointdamping on the ragdoll has been inrcreased to 0.005, both which slow the animation down to give the impression of "size".
Saturday 30 June 2012
Locked Ragdolls
This simplistic video shows how with SR1 there is a ragdoll movement option called "Locked", which locks the figure in the starting pose, but it still reacts to the physics in the scene. It's like "Keyframed", however with Keyframed the whole figure will not move as part of the physics simulation (it moves via keyframes instead).
Wednesday 27 June 2012
Tower Builder Script
In case anyone is interested, the script to create the building used in this video follows:
import poser
print
blockHeight = 0.8
yDelta = 0.1 * blockHeight
def newBlock(x, z, y):
poser.Scene().LoadLibraryProp("/Runtime/Libraries/Props/Primitives/box.ppz")
poser.Scene().CurrentActor().ParameterByCode (poser.kParmCodeXTRAN).SetValue(x)
poser.Scene().CurrentActor().ParameterByCode (poser.kParmCodeZTRAN).SetValue(z)
poser.Scene().CurrentActor().ParameterByCode (poser.kParmCodeYTRAN).SetValue(y)
poser.Scene().CurrentActor().ParameterByCode (poser.kParmCodeYSCALE).SetValue(blockHeight)
poser.Scene().CurrentActor().SetName("building_" + poser.Scene().CurrentActor().Name())
def row2x2(y):
global yDelta
a = 0.09
newBlock (a, a, y)
newBlock (-a, a, y)
newBlock (-a, -a, y)
newBlock (a, -a, y)
y = y + yDelta
b = 0.11
newBlock (0.0, b, y)
newBlock (-b, 0, y)
newBlock (0.0, -b, y)
newBlock (b, 0.0, y)
newBlock (0.0, 0.0, y)
def row3x3(y): # 2 & 3
global yDelta
a = 0.15
b = 1.1
newBlock (a * 0.5, a * b, y)
newBlock (-a * 0.5, a * b, y)
newBlock (a * 0.5, -a * b, y)
newBlock (-a * 0.5, -a * b, y)
newBlock (a * b, a * 0.5, y)
newBlock (a * b, -a * 0.5, y)
newBlock (-a * b, a * 0.5, y)
newBlock (-a * b, -a * 0.5, y)
y = y + yDelta
newBlock (0, a, y)
newBlock (a, a, y)
newBlock (-a, a, y)
newBlock (a, 0, y)
newBlock (-a, 0, y)
newBlock (0, -a, y)
newBlock (a, -a, y)
newBlock (-a, -a, y)
def row4x4(y): # 3 & 4
global yDelta
a = 0.14
b = 0.9
newBlock (0, a * 2 * b, y)
newBlock (a * 1, a * 2 * b, y)
newBlock (-a * 1, a * 2 * b, y)
newBlock (a * 2 * b, 0, y)
newBlock (a * 2 * b, a * 1, y)
newBlock (a * 2 * b, -a * 1, y)
newBlock (0, -a * 2 * b, y)
newBlock (a * 1, -a * 2 * b, y)
newBlock (-a * 1, -a * 2 * b, y)
newBlock (-a * 2 * b, 0, y)
newBlock (-a * 2 * b, a * 1, y)
newBlock (-a * 2 * b, -a * 1, y)
y = y + yDelta
newBlock (a * 1.5, a * 1.5, y)
newBlock (a * 0.5, a * 1.5, y)
newBlock (-a * 1.5, a * 1.5, y)
newBlock (-a * 0.5, a * 1.5, y)
newBlock (a * 1.5, a * 0.5, y)
newBlock (a * 1.5, a * -0.5, y)
newBlock (-a * 1.5, a * 0.5, y)
newBlock (-a * 1.5, a * -0.5, y)
newBlock (a * 1.5, -a * 1.5, y)
newBlock (a * 0.5, -a * 1.5, y)
newBlock (-a * 1.5, -a * 1.5, y)
newBlock (-a * 0.5, -a * 1.5, y)
def row5x5(y):
global yDelta
a = 0.14
b = 1.1
newBlock (a * 0.5, a * 2 * b, y)
newBlock (a * 1.5, a * 2 * b, y)
newBlock (-a * 0.5, a * 2 * b, y)
newBlock (-a * 1.5, a * 2 * b, y)
newBlock (a * 2 * b, a * 0.5, y)
newBlock (a * 2 * b, a * 1.5, y)
newBlock (a * 2 * b, -a * 0.5, y)
newBlock (a * 2 * b, -a * 1.5, y)
newBlock (a * 0.5, -a * 2 * b, y)
newBlock (a * 1.5, -a * 2 * b, y)
newBlock (-a * 0.5, -a * 2 * b, y)
newBlock (-a * 1.5, -a * 2 * b, y)
newBlock (-a * 2 * b, a * 0.5, y)
newBlock (-a * 2 * b, a * 1.5, y)
newBlock (-a * 2 * b, -a * 0.5, y)
newBlock (-a * 2 * b, -a * 1.5, y)
y = y + yDelta
newBlock (a, a * 2, y)
newBlock (a * 2, a * 2, y)
newBlock (0, a * 2, y)
newBlock (-a, a * 2, y)
newBlock (-a * 2, a * 2, y)
newBlock (a * 2, a, y)
newBlock (a * 2, 0, y)
newBlock (a * 2, -a, y)
newBlock (-a * 2, a, y)
newBlock (-a * 2, 0, y)
newBlock (-a * 2, -a, y)
newBlock (a, -a * 2, y)
newBlock (a * 2, -a * 2, y)
newBlock (0, -a * 2, y)
newBlock (-a, -a * 2, y)
newBlock (-a * 2, -a * 2, y)
# Unrem to delete any figures from the scene
#for f in poser.Scene().Figures():
# poser.Scene().SelectFigure(f)
# poser.Scene().DeleteCurrentFigure()
for p in poser.Scene().Actors():
if (p.IsProp()):
if string.find(p.Name(), "building_") != -1:
print "Deleting " + p.Name()
poser.Scene().SelectActor(p)
poser.Scene().DeleteCurrentProp()
print "Creating Cubes"
y = 0
row4x4(y)
y = y + (2 * yDelta)
row4x4(y)
y = y + (2 * yDelta)
row4x4(y)
y = y + (2 * yDelta)
row3x3(y)
y = y + (2 * yDelta)
row3x3(y)
y = y + (2 * yDelta)
row3x3(y)
y = y + (2 * yDelta)
row2x2(y)
y = y + (2 * yDelta)
row2x2(y)
y = y + (2 * yDelta)
row2x2(y)
print "Finished - pls wait while screen refreshes - this could take some time"
Tuesday 26 June 2012
PoserPhysics SR1 Notes
This is a running list of SR1 changes, which I will keep up to date as things change. SR1 have not been released yet - this is simply to give you forewarning of changes.
New Features
- Universal Joints have been added. The UniversalX is like a ball joint, but with no SPIN/TWIST in the X Axis direction (as the props are positioned in frame 1). UniversalY has no spin in the Y direction, and UniversalZ has no spin in the Z direction. Universal joints are great for simulating things like chain links. I will post a demo video shortly.
- The system will now ignore Invisible props (since this adversely effect the simulation).
- You can now join a prop to the GROUND for fixed joints, and other joints where the anchor point is "Child Origin".
- Added joint rotations around the Child origin and endpoint. The original "Origin" and "Endpoint" selections have changed to "Join To Origin" and "Join To Endpoint". Use the "Prop Origin" or "Prop Endpoint" for prop ball joins to the GROUND so it rotates on it's own Origin or Endpoint point.
- Added Cylinders. Use the PoserCylinder to add cylinder elements to your scene. IMPORTANT: The ODE does not support Cylinder to Capsule or Cylinder to Cylinder collisions. So the PhysicsCylinder will only bounce (collide) off boxes, spheres and static trimesh shapes. The cyclinder has been included for use as car wheels, where cylinder to cylinder and cylinder to capsule collisions are generally not required.
- Added Damping to the simulation, so that objects do not spin or roll forever. In the unlikely event you need to change the default settings, change the PoserPhysics-LinearDamping and PoserPhysics->AngularDamping parameters on the UNIVERSE actor.
- For joining props, you NO LONGER USE THE POSER PARENTING system. Instead, simply select the prop to join the current prop to in the "Join To" combobox in the Prop/Figure Settings tab of the PoserPhysics window. Any parented prop in your scene will be unparented when the simulation is run.
- Added the setGravity(gravity) function to the API. Removed the PoserPhysicsEngine(gravity = ?) option - simply call as PoserPhysicsEngine() now.
- Motors have been added. These are a special type of Hinge joint, which has twist force applied. Select the MotorX, Y or Z joint type. The velocity of the rotation is set in the PoserPhysics->Velocity dial for that actor, and the acceleration is set by the PoserPhysics->MaxForce dial. For a simple sample, load a box, lift it a little, join it to the GROUND, set to MotorX, anchor point Child Endpoint.
- A new ragdoll keyframe movement type has been added called "Locked". This mode creates the ragdoll, but locks the joints in a fixed position. There is an additional dial added to the ragdoll called PoserPhysics-LockedSoftness, which is you set this to anything other than the -1 default, applies this value to the CFM of the joints. In effect, you can make the joints rigid (with a value of -1 or 0), or flexible (with a value of say 0.001). This is experimental at this stage, so use at your own risk!
Fixes
- There is now user input validation of the numeric input fields of the PoserPhysics dialog.
- You can now no longer have two PoserPhysics windows open at the same time
- Fixed the instance where checkbox inputs were not being saved in the Scene Settings tab
- The capsule has been renamed to PoserCapsule. Delete the capusle.pp2 (not ppZ!) file from the primitives folder. The standard Poser capsule and cylinders are not supported - use the PhysicsCapsule and PhysicsCylinder instead.
- Fixed an instance when the old version of PoserPhysics had been installed on Poser 9/Poser Pro 2012, stopped the new version from working.
Sunday 24 June 2012
Getting a Figure to Fall Into a Chair
M4 falling into a chair. First go I just bent his thighs and shins a little, but he slumped forward and eventually fell off the chair.

For the second simulation, I bent his abdomen back 13 degrees, and he then fell nicely into the chair and came to rest. Chair was set to Immoveable.


For the second simulation, I bent his abdomen back 13 degrees, and he then fell nicely into the chair and came to rest. Chair was set to Immoveable.

Friday 22 June 2012
New Joint System Tutorial
Additional Items:
- Do not have 2 props joined together touching (or intersecting) at the start of the simulation.
- In the shipped PoserPhysics 2012, you can anchor a prop to it's parent's "Origin" or "Endpoint". This tutorial was done using PoserPhysics 2012 Service Release 1, which adds a third option "Child Origin" (with is the current props Origin point).
- The Poser Primitive box prop has it's Origin at the bottom of the box, and the EndPoint in the top of the box.
- The Poser Primitive sphere prop has it's Origin in the middle of the ball and the EndPoint at the outer perimeter. So the EndPoint of the sphere is not generally a good place to anchor another prop to - parent to the Origin of the sphere. You can link together many spheres (by parenting each sphere to other and setting the anchor point to the Origin) to get effect.
- The Poser Primitive capsule prop has it's Origin on the left end and EndPoint on the right end, so it is the ideal prop to use for linking components together as Ball or Hinge joints to create rope, etc.
- SR1 will also add a Universal Joint, which is simply a Ball Joint which does not allow twists. The Universal Joint will be ideal for simulating chain links.
Troubleshooting
PoserPhysics 2012 has been release, and there have been almost no reported issues, which is great. Some items that you should note though:
- Do not have more the one instance of the PoserPhysics2012 script running at a time. I will add a check in SR1 to make sure a second copy is not started.
- Whilst the PoserPhysics window is displayed, it is using the Poser python callback system to detect when you select different Poser scene elements. If you run another PoserPython script which sets the Poser callback (which is highly unlikely), PoserPhysics will no longer know when you change your figure or prop selection in the scene. If you do need to run such a script, simply close the PoserPhysics window first.
- If you have previously installed the old PoserPhysics plugin into your Poser9 or PoserPro2012 Runtime (which would not have worked), make sure you delete it prior to installing PoserPhysics2012. So delete the following folders/files:
- Runtime\Python\Lib\site-packages\P6
- Runtime\Python\Lib\site-packages\P7
- Runtime\Python\Lib\physics*.*
- Runtime\Python\poserscripts\PoserPhysics - There is a capsule primitive (pp2) supplied with PoserPhysics which gets installed in the Primitives folder, and loads into your scene as "capsule" (lowercase "C"), and you may already have the Smith Micro supplied capsule (pz2) in the same folder, which loads into your scene as "Capsule" (uppercase "C"). Either of these props work in PoserPhysics, however the former is simulated as a "Capsule", and the later defaults to a "trimesh box". If using the Smith Micro supplied capsule, set the Shape to "Trimesh Capsule". This is will set as the default in SR1.
- The valid "Bounciness" range is 0 - 1, however the PoserPhysics GUI will let you entered numbers greater than 1 (which will be address in SR1). Keep Bounciness <= 1.
Wednesday 20 June 2012
PoserPhysics 2012 is Released
PoserPhysics 2012 can now be purchased through Smith Micro at http://poser.smithmicro.com/poserphysics.html.
Tuesday 19 June 2012
Rolling Car Simulation
A very simple simulation to demonstrate how 4 spheres can be joined (using a hinge joint) to a car body, which then rolls down a bumpy slope - using PoserPhysics. No python needed for this simulation.
Wednesday 6 June 2012
Collection of Joints
PoserPhysics2012 joints in action. Ball joints hold the chain (capsules) together. The top capsule of the chain has a fixed joint to the spinning box. The spinning box has a HingeY joint to the supporting pole. The whole thing is put in motion by a ball placed inside an immoveable box.
Tuesday 5 June 2012
Newton's Cradle
Monday 4 June 2012
Joint Hardness
A very quick example showing how you can join spheres end-to-end and
then adjust the Joint Hardness of the simulation to get different
effects. I will do a more detailed tutorial once PoserPhysics2012 is
released.
Subscribe to:
Posts (Atom)