Wednesday 21 November 2012
PoserPhysics SR1 has been released
To update to SR1, re-download the installer from the Content Paradise. Release notes are at http://poserphysics.blogspot.com/2012/08/final-sr1-release-notes.html. The product is available at http://www.contentparadise.com/productDetails.aspx?id=21456.
Monday 19 November 2012
OctaneRender for Poser Has Been Released
Version 1.0 of the plugin was released today. There is a video of all the features in action at https://vimeo.com/53821805. The feedback so far from the beta testers has been incredibly positive, so I think everyone will love this plugin!
See http://render.otoy.com/forum/viewtopic.php?f=7&t=25193 for more details.
See http://render.otoy.com/forum/viewtopic.php?f=7&t=25193 for more details.
Sunday 11 November 2012
OctaneRender SSS Skin Shader
Poser Skin materials are converted to an OctaneRender glossy material by the OctaneRender for Poser plugin. This will get you 90% of the way to a realistic human skin render. If you want to push the envelope, the you can build your own OctaneRender SSS shader, and save it (rightclick the material in the Material tab of the plugin and select Export) using the plugin for use on all your human figures.
This is the SSS shader I have been using for the Victoria 4 figures. It should work fine on other figures. The shader is made up of a diffuse and a glossy material, mixed together with more (0.7) diffuse than glossy. The diffuse will provide the SSS, whilst the glossy will provide the highlights.
NOTE: The only need to do the following ONCE! Create the shader once, then save it as a material (rightclick -> "Export Material"), then copy and paste the material it to all the skin materials of your figure and rightclick the mesh -> "Export all Materials for this Figure/Prop". Then you can reload all the skin materials with the SSS shader at any point, and keep or replace the texturemaps that are currently assigned to the figure.

To create this shader, pick a skin material on you figure. Then change the material type from "glossy" to a "material mix" (change the node type in the bottom box of the plugin window). Set the "amount" to 0.7, leave "material1" as a "diffuse" material and set "material2" to "glossy".
Expanding "material1" (the diffuse material) above shows...

The important parts are:
Expanding "material2" (the glossy material) shows...

The important parts are:
IMPORTANT - you need to use the "pathtracing" kernel in order for the "scattering" node to work. Also, I recommend reducing the scene "gamma" in the imager settings (try around 0.8).

Good luck!
This is the SSS shader I have been using for the Victoria 4 figures. It should work fine on other figures. The shader is made up of a diffuse and a glossy material, mixed together with more (0.7) diffuse than glossy. The diffuse will provide the SSS, whilst the glossy will provide the highlights.
NOTE: The only need to do the following ONCE! Create the shader once, then save it as a material (rightclick -> "Export Material"), then copy and paste the material it to all the skin materials of your figure and rightclick the mesh -> "Export all Materials for this Figure/Prop". Then you can reload all the skin materials with the SSS shader at any point, and keep or replace the texturemaps that are currently assigned to the figure.

To create this shader, pick a skin material on you figure. Then change the material type from "glossy" to a "material mix" (change the node type in the bottom box of the plugin window). Set the "amount" to 0.7, leave "material1" as a "diffuse" material and set "material2" to "glossy".
Expanding "material1" (the diffuse material) above shows...

The important parts are:
- diffuse is a multiply node. So copy the existing texturemap (rightclick-> copy image node), change the diffuse node from image to multiple. Then rightclick texture1 and "paste image node"
- texture2 - this removes some red from the image map (to compensate for the red being added by the scattering medium. Start with red=150, green=200, blue=255, and adjust to get the right skin tones.
- transmission - set to red=255, green=0, blue=0. So change it from the default "floattexture" to "RGBspectrum". IMPORTANT: You can also copy and paste the image node from above into this node, which nicely stops SSS appears on dark areas of the map (like hair). If you do this, lower (halve) the "scale" below.
- medium - change from "absorption" to "scattering".
- absorption/scattering. The ratio of these two multiplied by the scale seem to control the amount of SSS (and how far it travels). The settings above seems to give a good starting point for human figures. NOTE: The plugin rescales to figures to OctaneRender units, so these settings will be too high if you setting this shader up in OctaneRender Standalone.
- scale - IMPORTANT - this number effects the amount of the SSS effort. Small number like 2-5 will give lots of SSS, large numbers like 20-50 will give a very subtle SSS effect. Adjust the scale to get the effect you want for the lighting in the scene.
Expanding "material2" (the glossy material) shows...

The important parts are:
- texture1 - this is the image map for the material, and can be copies (rigthclick -> copy image node) from the diffuse material above.
- texture2 - this is currently set to 255/255/255, but can be used to fine tune the skin tone.
- specular - change from the default "floattexture" to "RGBspectrum". Set the color to red=10, green=20, blue=30
- roughness - Increasing from 0.3 will result in drier looking skin. Reducing results in very oily skin.
- Remember to set filmwidth to 1.0
IMPORTANT - you need to use the "pathtracing" kernel in order for the "scattering" node to work. Also, I recommend reducing the scene "gamma" in the imager settings (try around 0.8).

Good luck!
OctaneRender for Poser Features
OctaneRender for Poser is a fully integrated OctaneRender solution for Poser 9 and Poser Pro 2012. OctaneRender is the world's fastest and most feature rich unbiased render engine. This plugin provides access to all OctaneRender functions from the Poser user interface.

The plugin has been specifically designed to suit the workflow of Poser users. So all the OctaneRender options are available in the one setup screen, activated from the Poser Render menu.
The plugin automatically converts your Poser scene geometry and materials into the Octane scene, so you get a quality render with just the default settings. From the Octane settings window you can specify camera and image parameters, select from 4 available OctaneRender rendering modes, and choose between image based lighting, sunlight, or geometry emitters to illuminate your scene. The plugin will even convert any Poser IBL images and assign them to the environment map lighting in Octane. All Poser Materials will be converted to Octane materials, and you can edit these materials in the Material tab (see below). Righclicking the props, figures or materials in the tree allows you to do various macro functions, including loading and saving individual materials or entire material collections.

Once you open the Octane Render Viewport, the render starts immediately, and is instantly refreshed when you change the Poser camera direction, or change any of the Octane materials.

The viewport (shown above) allows you to start and stop the render, lock/unlock the resolution, save the image, drag the viewport to resize the render and get vital rendering statistics (the bottom status bar). If you click anywhere in the image, the focal distance will be set to that point.
The viewport is immediately updated with any new material or OctaneRender settings that you change. The "imager" settings can be changed at any time without causing the render to restart.

There is an on-line material database, containing hundreds of materials, which can be loading into your scene.

Animations can be rendered via the Animation tab. This contains controls for start and end frame, camera focus behavior, and even allows the keyframe animation of light emitter intensities.

The first update for OctaneRender for Poser will include the new Instancing features of Octane, allowing a single prop to be duplicated in the scene many times.

OctaneRender for Poser will be available from render.otoy.com from mid-late November 2012.
Monday 5 November 2012
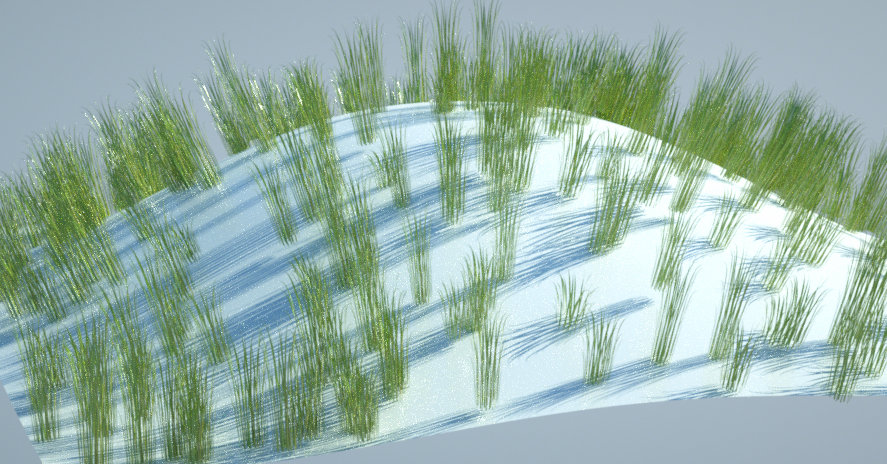
Instancing
I've been looking at how Instancing could be applied in OctaneRender for Poser. It's going to be as simple as changing the "mesh" type to "scatter" for a Poser scene element.

Once it's a "scatter" node, select a pre-calculated transformation matrix (csv) file, or generate a new one. You specify the Poser prop that the instances will be randomly placed on, and specify some density and randomising paramters. Calculating 1000 instances only takes a few seconds.

Then render!


Once it's a "scatter" node, select a pre-calculated transformation matrix (csv) file, or generate a new one. You specify the Poser prop that the instances will be randomly placed on, and specify some density and randomising paramters. Calculating 1000 instances only takes a few seconds.
Then render!
Subscribe to:
Posts (Atom)